Milly's 101: A Christmas Turkey
If you’re on Christmas dinner this year and the thought of cooking your first turkey is leaving you sleepless, take a look at our “Christmas Turkey 101” which will, hopefully, dial down the stress a little. Remember that a turkey is really just an extra big chicken – you’ve got this!
Defrosting: Most turkeys these days are purchased frozen. The safest way to defrost them is gently, over two to three days in the fridge. Make sure to sit your bird in a large roasting dish or deep platter that will catch any drips and to store it as low as you can in the fridge (where it’s cooler and spills won’t contaminate other food). Once it’s fully defrosted, your turkey should be cooked within 24-36 hours.
Brining: Brining is the ‘buzzword technique’ right now but, after trying it for the last couple of years, we’re not totally convinced that it’s worth all the palaver. Instead we’re going back to basics and simply roasting our bird with a little herby butter pushed under the breast skin. Plus, we’re roasting it breast-side down for the first hour which pushes the juices into the breast meat before flipping it onto its back. If you do want to give brining a try, use a ratio of 50 grams of table salt to a litre of water plus any flavourings of your choice (maple syrup, sugar, citrus, spices and herbs), make sure your brine is chilled and definitely dry the skin before roasting (a few hours, uncovered in the fridge will do the trick - wet, flabby skin will never brown or crispen).
Stuffing - We allow about two cups of stuffing per 1kg of turkey. Choose whatever recipe that takes your fancy – we always love anything that combines cubed or crumbed bread, dried fruit (cranberries are a favourite at this time of year), onions and garlic (sweated in a little butter, citrus rind of some description and something crunchy – pinenuts are a favourite plus lots of chopped fresh herbs. Pack stuffing into the bird loosely for two reasons: it will expand as it cooks, and, tightly packed stuffing will not heat through as quickly which makes it more susceptible to bacterial growth.
A good roasting dish is imperative: We recommend a heavy based pan (stainless steel is great) with 5-7cm sides. These protect the lower part of the bird and prevent over evaporation of the roasting juices which are essential for well flavoured gravy.
Fat separating jug: To easily degrease your pan juices making for tasty gravy that won’t have you up in the night looking for the Quickeeze.
Meat thermometer: We think a good quality meat thermometer (digital is best) is essential for taking all the guesswork out of any meat cookery. Click here for our final resting temperature chart and a guide on how to use a meat thermometer. Incidentally, if your turkey comes with a pop up timer, I’d be tempted to throw it away as I’ve never seen one of these work accurately (just my opinion, Liz).
Bear paws: Perfect for lifting the whole turkey out of your pan without it ending up on the floor after being balanced on a series of fish slices!
Carving Board: A grooved or curved board will catch all those delicious juices for even more flavourful gravy.
Trussing: We subscribe to the ‘no trussing’ school of poultry cooking. Simply loosely pack your stuffing, either do or don’t butter under the breast skin and then place your bird in the roaster. You may loosely tie the drumsticks together with kitchen string, but traditional trussing lengthens the cook time of the dark meat, leaving the breast meat susceptible to drying out.
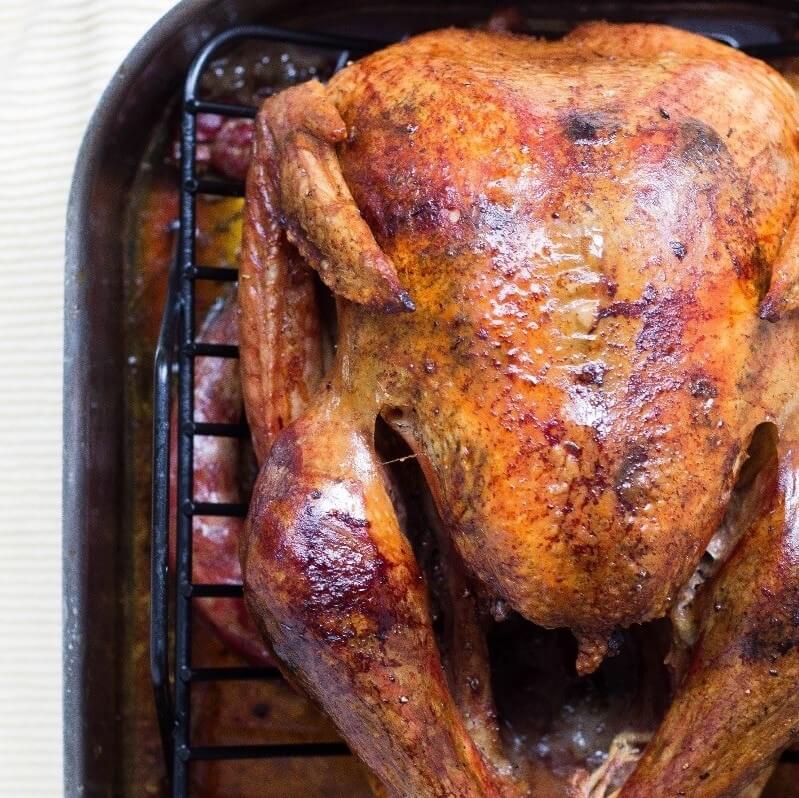
Cooking: Rub your turkey all over with olive oil or clarified butter (or a combo of both) and salt the skin liberally. Preheat the oven to 160C (conventional rather than fan bake). Try to get your racks organised so that the top most part of the turkey is sitting about half way up the oven. We find the back of an oven is often hotter than the front so if your oven is large enough, try to face the legs towards the back – again, we’re trying to get that dark meat to cook more quickly. If you can only get your turkey in sideways, remember to rotate the roasting dish halfway through to allow even cooking. And if during the cook you feel that the skin is browning too quickly, cover the bird with foil. Remove the foil about 15 mins before the end to allow the skin to re-crispen.
Roast your turkey breast side down for the first hour or so (you could place a little parchment paper down under the breast to ensure the skin doesn’t catch and tear when you turn it over) then flip it onto its back to carry on roasting until the internal temperature reaches at least 70C – make sure you test the stuffing temperature too. Check in several different places as the thigh meat will always take a little longer and check both thighs as sometimes if your oven has a cool spot both will not be cooked the same. The internal temperature will continue to rise during resting and you should reach the desired 75C during this time. An approximate rule of thumb is 35 minutes per kilo for a stuffed bird but a meat thermometer will give you a much more accurate idea of what’s going on.
Resting: You can rest a large cooked turkey, tented in foil and in a warm place, for up to an hour which, if you’re pressed for oven space, is just the right amount of time to get those spuds cooked. Resting allows all those wonderful juices to be redistributed throughout the bird again. There will be some residual juices in the bottom of your roaster after resting – don’t forget to add them to your gravy.


