


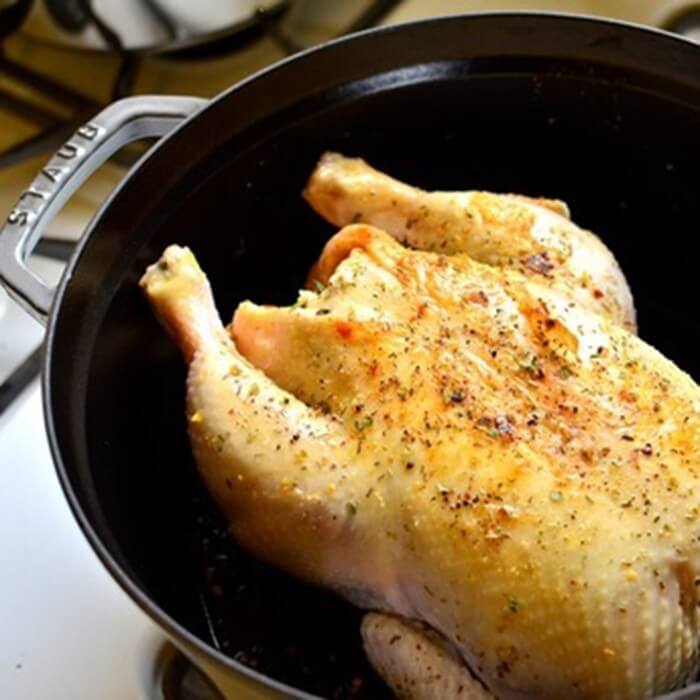
Milly's 101: Dutch Oven Chicken
Anyone who is tasked with getting dinner on the table every night will know that there are just those nights: you’re late out of work, traffic is terrible, plans are in chaos and it’s getting worse by the minute. Add into the mix a chicken that just had to be cooked that night and you have a scene that plays out in many New Zealand kitchens every week. Tuesday Night, Totally Out of Time and Inclination...Dutch Oven Chicken's the answer.
I had been thinking about pot roasting a chicken for a while – it’s a very classic French technique just made for a cast iron dutch oven. But I hadn’t done my homework and certainly wasn’t prepared with either ingredients or method (other than a chicken glaring at me from the fridge). It was well after 6pm and I had a raw chicken and … no plan. It ended up going a bit like this:
All you need is:
1 Organic, free range chicken.
Olive oil or butter or a mix of the two.
A lemon, totally optional.
Salt and pepper.
1. Oven on to 180C.
2. Pat chicken dry with paper towels, brush with olive oil and dust liberally with salt and pepper, inside and out. Pop a cut up lemon inside if you have one.
3. Over a medium heat, add a slosh of olive oil and a knob of butter and lay your chicken in, breast side down. Brown for a few minutes and then turn onto each side to brown them too.
4. Turn the chicken onto its back and brown a little more. Pop the lid on and get it into the oven for about 20 minutes.
5. Whip it back out of the oven, turn the chicken breast side down and roast for a further 30-40 minutes (or as long as it takes to drop the cat to the vet – another Tuesday night drama).*
6. Remove the chicken from the pot and rest it, covered, breast side down in a warm place for 15 minutes or so.
7. Pour off the (considerable) pan juices into a fat separator jug and then pour the chicken ‘stock’ only back into the dutch oven. Reduce this ‘jus’ down to an intensely flavoured, ‘syrupy’ sauce, seasoning to your preference.
8. Carve the chicken (or just pull it to bits as I do) and serve it with whatever you can find (I did a silky smooth potato mash and green beans).

A chicken cooked this way will never give you crisp skin but I have to tell you that this was one of the best chickens I have cooked, ever. Silky smooth, succulent, richly flavoured flesh with a spoonful each of the most gorgeous ‘chickeny’ sauce. The cocotte’s well fitting lid permits almost no evaporation so meat cooks in it’s own juices and flavours are sealed in and intensified. I’m definitely doing this again – maybe with more prep this time! I encourage you to try (and let me know how you go).
* The cooking time after you’ve turned the chook over will depend on both the size of your bird and of your cocotte – you can be sure it’s cooked by inserting a meat thermometer into the thickest part – it should read 70C and should raise to 75C during the resting period).
More from our Recipe Library ...
View all