
Milly's 101: Ice Cream Machines

Thinking about investing in an ice cream machine? Here's our guide to choosing the ideal machine for your kitchen ...
Homemade ice cream and gelato are very easy to make at home. When you DIY your ice cream, you are control of 'what and when' as freshly churned ice cream containing only the ingredients you are happy to serve to your family are included and you're guaranteed fresh ice cream when it suits you. But before you can dive into 'ice cream world', it's essential you choose the correct machine for your needs and capabilities and with so many options available, it can be overwhelming. Fear not, dear reader, the team at Milly's are ice cream machine experts and we're here to guide you through the process of selecting your perfect machine.
Ok, so what's available out there?
There are primarily two types of ice cream machines on the market today:
1. Freezer Bowl Models: These ice cream makers feature a liquid-filled bowl that needs to be frozen for about 12 hours before use. Once the bowl is properly and completely chilled, you add your ice cream mixture, turn on the machine, and let it work its magic. These machines are known for their simplicity and affordability and they're ideal for beginners. They work best for when you're making a single batch of ice cream.
One drawback to the freezer bowl models however, is that you'll need to plan ahead and remember to freeze the bowl in advance - or, if you have room, store the bowl full time in your freezer so you're ready at a moment's notice. Freezer bowl models are an excellent choice for those who want to dip their toes into the world of homemade ice cream before committing to a more advanced machine.
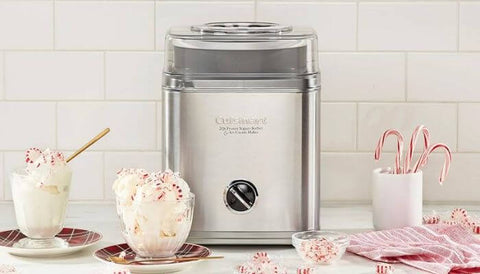
2. Compressor Models: If you're a true ice cream enthusiast and plan to make batch after batch or use it often, a compressor ice cream maker might be the way to go. These machines come equipped with an actual compressor (exactly the same as what makes your fridge work), effectively turning your ice cream maker into a freezer unit.
The process is straightforward - turn it on, wait for the chamber to cool down (usually about 10 minutes), pour in your mixture, and let the machine handle the rest. Compressor models are more substantial in size and come with a higher price tag, but for dedicated ice cream lovers, they are a worthwhile investment.

Bonus Option for KitchenAid Stand Mixer Owners: If you already own a KitchenAid stand mixer, you could consider their ice cream bowl attachment. This attachment is a freezable bowl that fits your machine. It operates similarly to the "bowl in the freezer" model, offering a space-saving alternative and making your stand mixer do double-duty.

Key Considerations You Should Factor in When Choosing Your New Ice Cream Machine:
When deciding between a compressor model ice cream machine and a freezer bowl model, these are the factors we think you should consider:
What's your budget? Compressor models tend to be more expensive than freezer bowl models so here's where you should consider your budget and how much you're willing to invest.
How often are you going to use it? Think about how often you plan to make ice cream. If you're an occasional indulger, a freezer bowl model will probably be the one for you. However, if you're an addict (like us) a compressor model could be the way to go.
Convenience and ease of use. Compressor models offer the convenience of not needing to pre-freeze the bowl in advance. You can make ice cream on a whim without planning ahead. And you don't need to make space in your freezer for 24 hours (or longer).
Space and Storage: Consider the size of your kitchen and appliance storage area. Compressor models are generally larger and heavier so if you're planning to store your machine off the bench in a cupboard or drawer, think about whether you'll be able to comfortably lift it. Freezer bowl models are typically more compact and easier to store.
Time: Compressor models usually have a faster churn time, allowing you to enjoy your ice cream sooner. Freezer bowl models may require longer freezing times between batches.
Batch Size: Determine how much ice cream you want to make in one go. Compressor models have both a larger capacity and the benefit of being able to churn batch after batch whereas the freezer bowl models are only good for a single batch.
Dishwashing and Maintenance: Consider the ease of cleaning and maintaining the machine. Some models have removable parts that are dishwasher safe but that is not always the case.
Noise Level: Compressor models can be noisier due to the compressor's operation (not the case with our Magimix Gelato Expert which is whisper quiet).
Do you need different settings? Both types of machines can usually accommodate various ice cream recipes, but compressor models often offer more advanced customisation options and automatic features.
Longevity: Consider the durability and longevity of the machine. Compressor models are often built to last longer due to their more robust construction.
Warranty: Check the warranty offered by the manufacturer for both types of machines. A longer warranty can provide peace of mind in case of any issues.
Consider the above points and then the team at Milly's can guide you from there on what machine suits your identified key features.

Here's some additional tips:
-
Fat and Sugar Content: Remember that ice cream needs fat and/or sugar to make it 'scoopable'. Adjusting the fat and sugar levels in your recipe can help you achieve your desired consistency.
-
Chilled Mixture: Ensure that your ice cream mixture is as chilled as possible before pouring it into your machine, especially with freezer bowl models. Warm mixtures will make the machine work harder and take longer to churn. The bonus to this is that, with the prep done the day before, your ice cream is super simple to make just before you wish to serve it (and your guests will be super impressed at your dessert wizardry!)
-
Preparation Time: Making your ice cream base mixture a day before churning can enhance both flavor and texture, especially for custard-based ice cream.
-
Consistency: Freshly churned ice cream will be more like a heavy snow freeze than solid 'straight from the freezer' ice cream. To achieve a firmer scoop, transfer your freshly churned mixture to a freezer-safe container and let it firm up for a few hours.
-
Storage: Seal your ice cream container tightly to prevent it from absorbing unwanted flavors from other items in the freezer.
-
Serving: Before serving, allow homemade ice cream to sit in the fridge for about 30 minutes to make scooping easier and enhance the flavor.
-
Freshness: Homemade ice cream is best enjoyed within a week. It's so delicious; you won't have trouble finishing it in no time!
Choosing the right ice cream machine is the first step on your journey to creating delectable homemade ice cream. Whether you opt for a freezer bowl model, a compressor machine, or a KitchenAid attachment, the joy of crafting your frozen delights will make it a worthwhile investment. Happy churning!
- Tags: use-and-care
← Older Post Newer Post →